Back to the Porcupine Lodge
Shelters are Number 1 in the Hoods Woods Rule of Threes
(You can survive 3 seconds without air, 3 hours without shelter, 3 days without water, 3 weeks without food)
From that rule, you can see how big a priority shelter is in a survival situation. That should also tell you that proficiency in shelter building is a MUST. Below are a few examples of field expedient shelters. The pictures used come from somewhere (A Military FM I believe) and I don't think they are copyrighted. If you see something your recognize or that you created, feel free to drop me a line at ridgerunnersurvival@hotmail.com
Figure 1, Lean-to
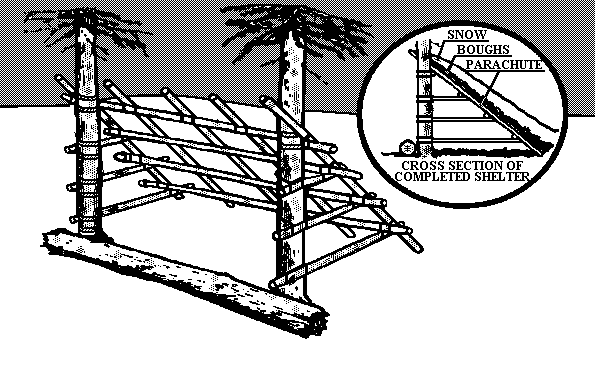
This design is by far one of the most familiar and easiest
to build temporary shelter.
You can build this shelter with or without a tarp and
if built right will keep the rain out quite well
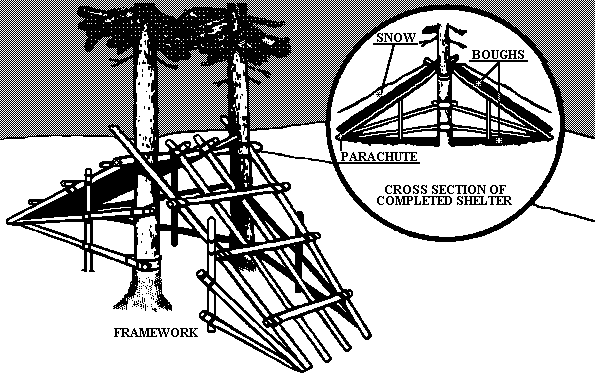
Build it double sided to make a tent like structure that
will keep out the wind and rain quite nicely.
See below:
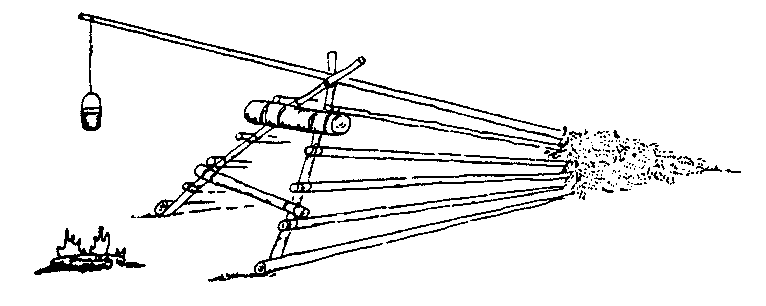
This is one variation on the Lean-to called the debris
hut. THis is a snug and cosy little hooch that
keeps you very warm. this design is particularly neat
because it utilizes the ridge pole to hang out your tucker to cook. This
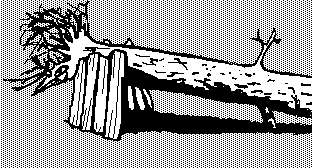
design can be changed by using short side polls and leaning them against
the ridge pole (human made ,large Log or rock) and laying the debris on
top. (see below)
Shelter Tips
The thing these Pictures do not see but from experience I have found to be essential, especially when building using only primitive materials or only a tarp is a series of latticework throughout the roof and sides of the shelter. This allows you to use smaller stuff such and piled leaves and stuff without fear of it falling through. Rainwater makes disconcerting bulges in the roof that can hold as much as 3 gallons of water depending on the size of the spaces between the lattice work. While this might sound like a good technique for water collection, it can also cause leaks and the weight can bring the whole shelter down on top of you.
My experience is that the spaces between your lattice work should
be no bigger than that of your hand stretched out. you can build your lattice
work in one of two ways, one is to select or cut sticks of similar length
and lash them in the desired pattern
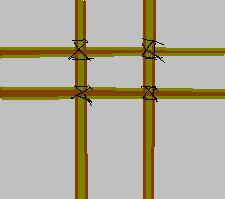
Or you can weave flexible green limbs between the crossbeam, the support beam and each other, this makes a particularly strong roof and saves on cordage as well

Shelter Choices & Materials
Shelter materials come in 3 categories:
1) Structural: Materials in this category are are such things as
Large saplings, logs rocks, anything that holds weight. In a survival situation,
it should be something that is easily procurable and strong enough to withstand
the weight of the other shelter materials listed below.
Saplings and large limbs being the structural material used in the
majority of shelters , I will concentrate on them
The choices you make in this stage of the shelter building process
will dictate what type and what size of shelter you build. Keep in mind
that bigger is not always better. A small tight shelter is easier to keep
warm via body heat than a larger more airy shelter type.
2) Weather Resistant: This category can contain anything from plastic
tarps to pine bows and bark to the shingles on your house. Like shingles,
the materials in this category must be able to keep the wind and water
out of a shelter and consequently keep you dry and warm. Good examples
of natural shelter materials are woven pine bows, reeds, cattail stalks
and grass thatch. Your materials choices will obviously depend on your
environment.
Note: because I lack the experience necessary to advise about tropical,
desert or plains environments, my recommendations will be centred on survival
shelter for a temperate environment in either a deciduous or coniferous
forest.
3) Insulation: this is the final phase of the shelter. Like the blankets on your bed, Insulation keeps your body heat where it belongs, in your body. select insulation that is prominent in your area. Some ideas might be pine needles, cattail fluff, grass or fur. Basically, you can use any fluffy dry material so long as it is not poisonous and contains no burs . Burs can create sores that will get infected; they are also darn uncomfortable!
I hope this little page helps you in your shelter building endeavours,
For more information, go to your local
Barns and Noble and look
for some good survival manuals. You can also get great information be heading
on over the Hoods
Woods Web site. Both options will give you great ideas and information.
Remember, though, you can watch every video and read every book but REAL
survival knowledge comes from practice practice practice!!